...
You can find a detailed tutorial on where to get the PDF Converter from and how to install and use it here .
From now on, we assume that you already have the PDF Converter installed on your system.
...
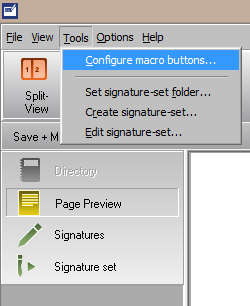
Step 1: Open the macro button menu via "Tools | Configure macro buttons" in your main menu.
| |
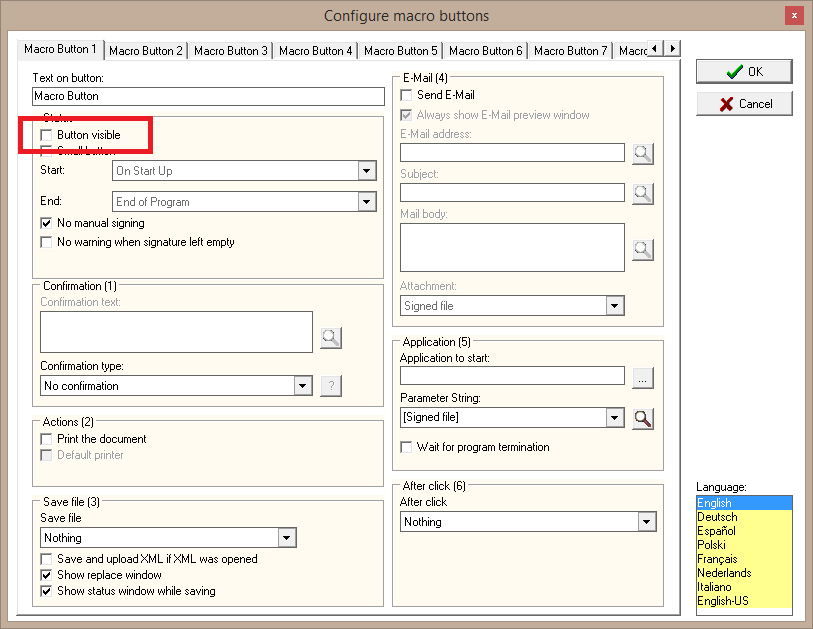
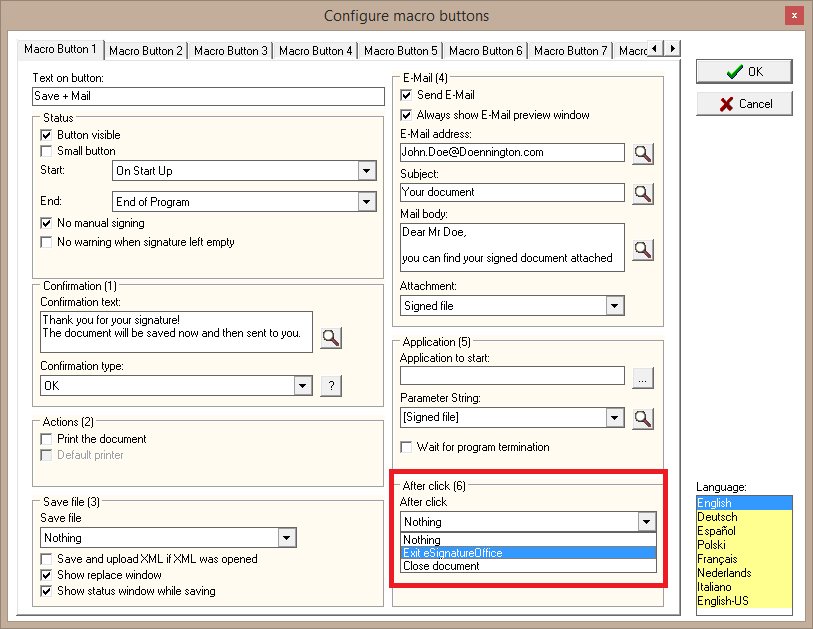
Schritt 2: Now, you will see this menu, where you can create up to 10 different macro buttons with a combined action each. You can name them as desired ( = "Text on button") and make them visible or invisible by activating or deactivating the option "Button visible" in the status field. If you want to use a macro in a signature-set, you can easily leave it invisible and so prevent it from being triggered manually. However, we want to trigger this example macro on demand and so, you should check "Button visible". This activates a new bar in the eSignature main user interface (below the tool bar), which includes all visible macro buttons.
| |
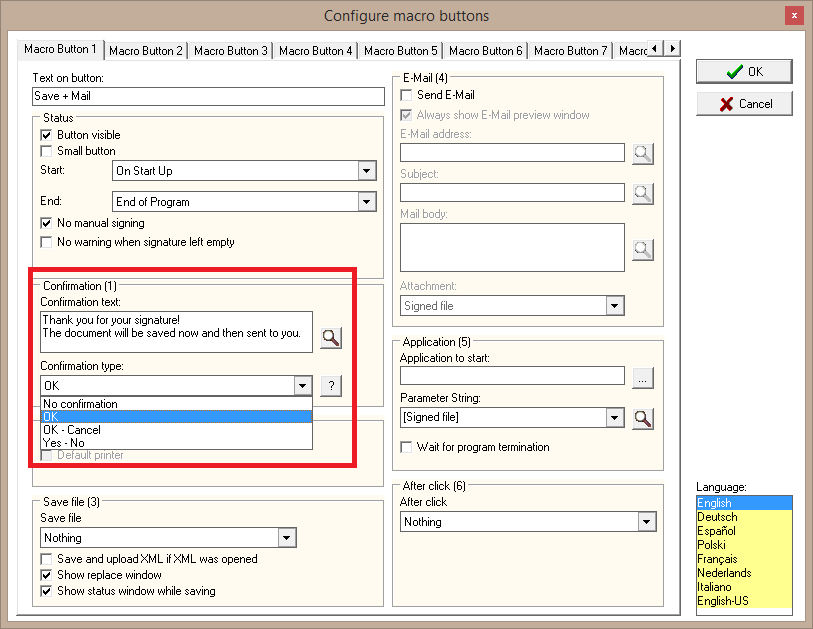
Step 3: Entering the confirmation message will only be unlocked after choosing one of the "confirmation type" options from the drop down menu in the "Confirmation (1)" field. So, you could even offer the option to cancel the process. In our example, however, we just use a simple confirmation message with an "OK" button and now can enter a message into the text box, which the user shall read later on, such as a hint to be shown before or after signing. With the help of the question mark button, you can get a preview of your confirmation dialogue.
| |
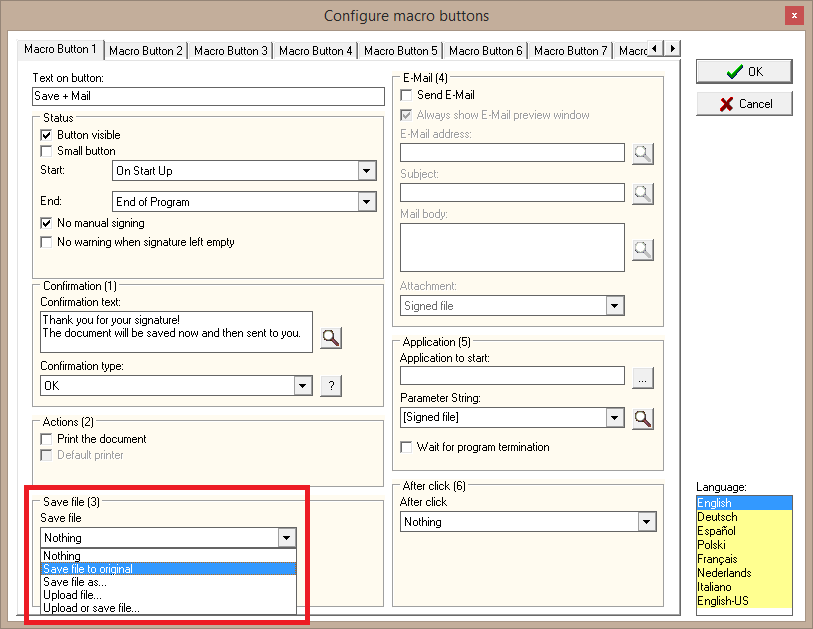
Stept 4: Now, appoint a method to save your document. The most common variant is overwriting the original file, of course. So, choose "Save file to original" from the drop down menu, please. This way, upon saving the original file will be overwritten without inquiry.
| |
Step 5: Now activate the subsequent sending per e-mail by activating the option "Send E-mail" on the right side of the menu. This way, your standard e-mail application will automatically be used and if you wish, you can get an editable preview of the E-Mail before it's sent by activating the option "Always show E-Mail preview window". If you want to add individual text to your e-mail, you obviously have to check this option. Additionally, you can enter the designated mail-adress, a subject and a text body now. Finally, you just have to choose what is to be attached to the mail. Normally, this would be the signed or saved document, but if you want, you can even send the original unsigned file, because upon loading the document, it is always saved as temporary file and so could be sent in its original state. 
| |
Step 6: In this second-to-last step, you're telling your macro to close eSignatureOffice after performing all the other actions, by choosing "Exit eSignatureOffice" from the drop down menu in the field "After click (6)" on the lower right side.
| |
Schritt 7: Finally, the creation of your macro is complete. When clicking the "OK"-button on the right side of the menu, you get back to the main user interface of eSignatureOffice and a new bar will be added just below the tool bar. There, you can find the new macro button, which can perform all the previously added actions one after another with only a single click and in the end, eSignatureOffice will be closed.
Congratulations! You are done! | |
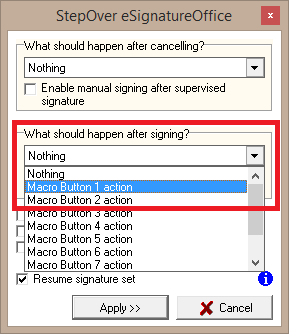
Step 8 (optional): Let's take some steps back to the previous chapter, which was about signature-sets. In one of the first steps, you were told to ignore the given drop down options, because they wouldn't do anything at this time. Now, you can add the freshly created macro in the "common settings" menu by choosing it from one of the drop down menus. Considering the nature of the chosen actions, it's advisable to let the macro be executed only after signing, not before.
|

...