...
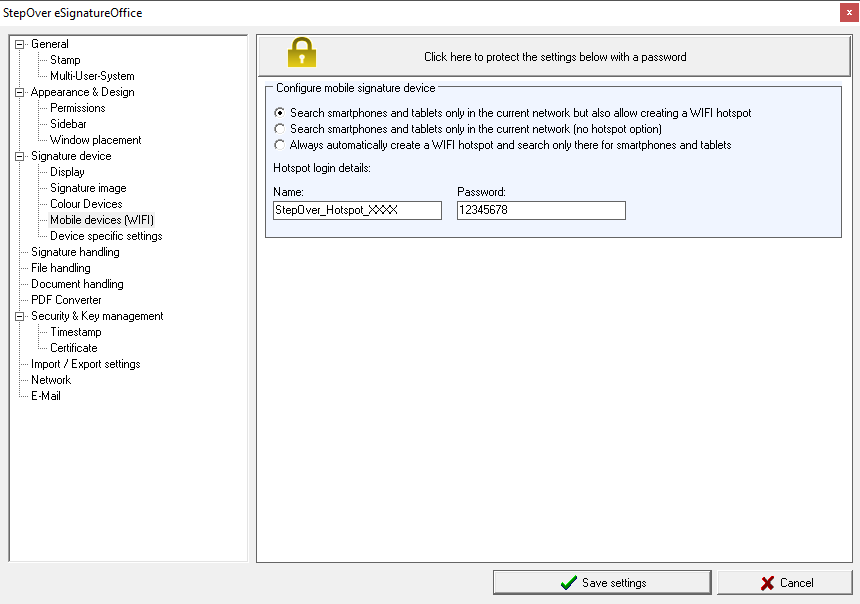 | |
Search smartphones and tablets only in the current network but also allow creating a WIFI hotspot | With this choice you will get an additional option in the device search menu to allow creation of a lokal hotspot (always given your computer hardware is capable of doing so). This way, each time you want to select your signature device, you can decide if you want to create a new hotspot network or if the already available WIFI network is already sufficient. If an additional hotspot network is created, then always with the login details shown here and where you can also change them. These login details will also be shown in the device search menu after the hotspot has been created. |
Search smartphones and tablets only in the current network (no hotspot option) | With this choice, the optional creation of an additional hotspot will not be available and mobile devices will only be found, if they are already in the same WIFI network as the computer, on which eSignatureOffice is running. |
Always automatically create a WIFI hotspot and search only there for smartphones and tablets | With this choice, an additional lokal hotspot will always be created automatically (of course given that your computer hardware is capable of doing so). For this hotspot, the login details given here will be used. These login details will also be shown in the device search menu after the hotspot has been created. |
| Hotspot login details: | With these login credentials, you can define the name as well as the password of your potential lokal hotspot. Please be aware that according to the current WPA2 standard this password has to be at least 8 characters long. When eSignatureOffice is first installed (and also with each reset to factory settings) a random network name as well as a random password will be created for you. |
...
duraSign NG Serie
This section contains options that are specific for the NextGen Pad.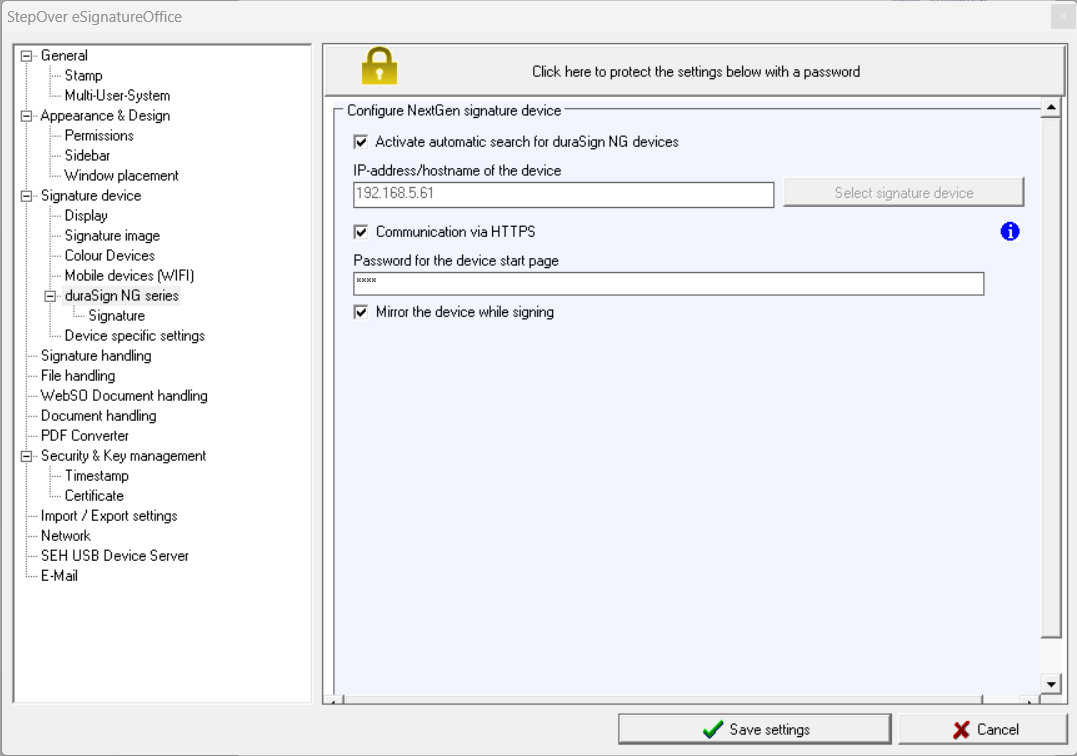
Activate automatic search for duraSign NG devices | For example, for a fixed selection of a NextGen Pad you can specify its name or IP address here. Alternatively, if you have activated the automatic search for NextGen devices, eSignatureOffice will search for corresponding devices in the network when you start.
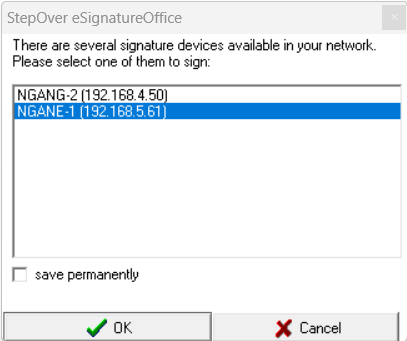
If more than one NextGen Pad is found in your LAN when starting eSignatureOffice, you will be given a selection option when starting.
With the "save permanently" option, this selection will no longer be displayed the next time you start. You can also change the selection again using the “Set signature device” menu button. |
| Communication via HTTPS | With this option, communication with the pad occurs over HTTPS instead of just HTTP. To use the HTTPS setting, HTTPS communication must also be enabled on the pad (default option). |
| Device Password | If you have protected access to the homepage with a password, you must store this in eSignatureOffice. Otherwise, access to the NextGen Pad for eSignatureOffice is not possible. |
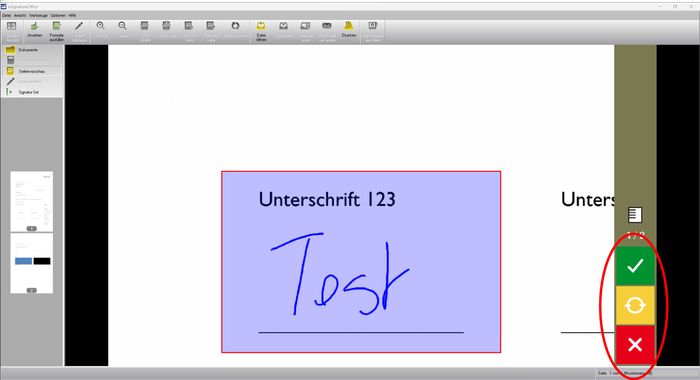
| Mirror the device while signing | With this option, the display on the pad within eSignatureOffice is mirrored during signature mode. You can also operate the buttons in the mirrored view while mirroring.
|
...
Signature
The following options allow you to customize the placement and size on the NextGen display.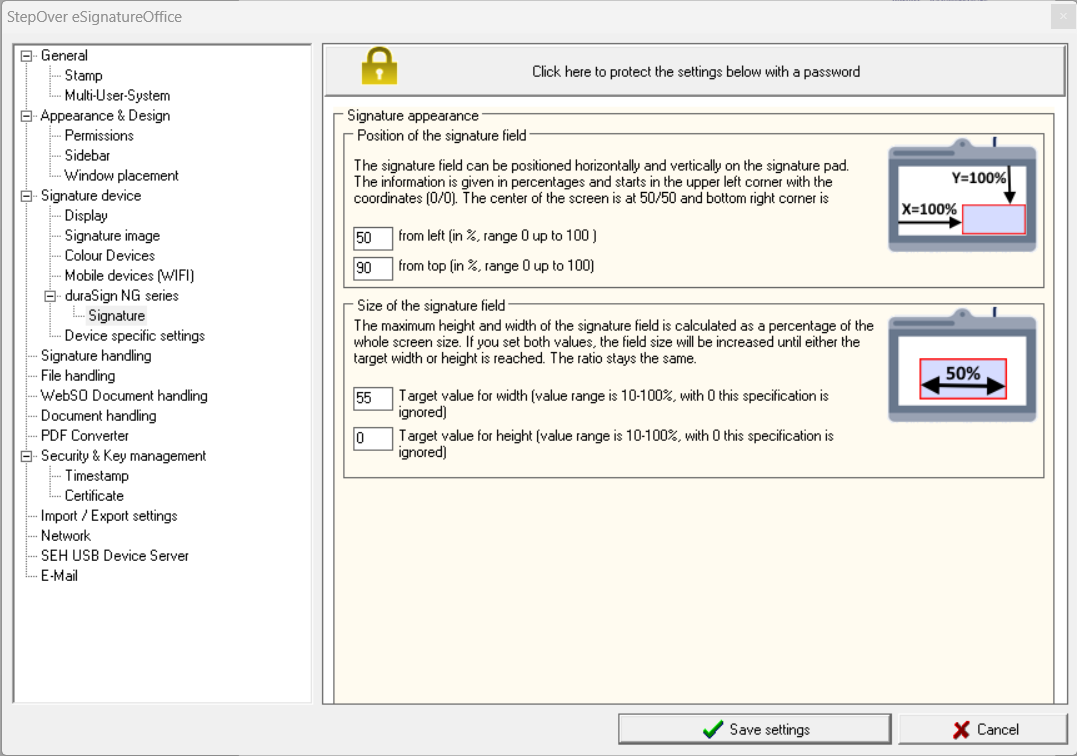
Position of the signature field | Here you can define the horizontal and vertical position of the signature as a percentage of the display width and height. The horizontal placement takes place from the left edge (0%) to the right edge (100%).
Vertical placement is from top edge (0%) to bottom edge (100%). With 50/50, the signature field is placed exactly in the middle of the device display. |
Size of the signature field | The height and width can also be defined as a percentage of the display. The minimum value is 10%, the maximum value is 100%. If you specify 0%, there will be no enlargement to the target width/height.
If you use a target value for the height and width, the signature will be proportionally enlarged until one of the two values is reached. |
...
Device specific
In this menu, you can find multiple settings which only apply as long as the signpad variant ist used, for which the particular setting has been done. This allows using different products at the same time while using settings, which are only relevant to this specific pad type. This includes features like a reduced area, in which the user can sign on the signpad (e.g. when using a custom background image), a precisely chosen target position and target size of the signature rectangle on pad with a large device display or if a device is supposed to be started or finished either in left- or right handed mode. As soon as this menu tab is selected, the currently connected signature pad is automatically detected and preset in the drop down list "Device Type".
...
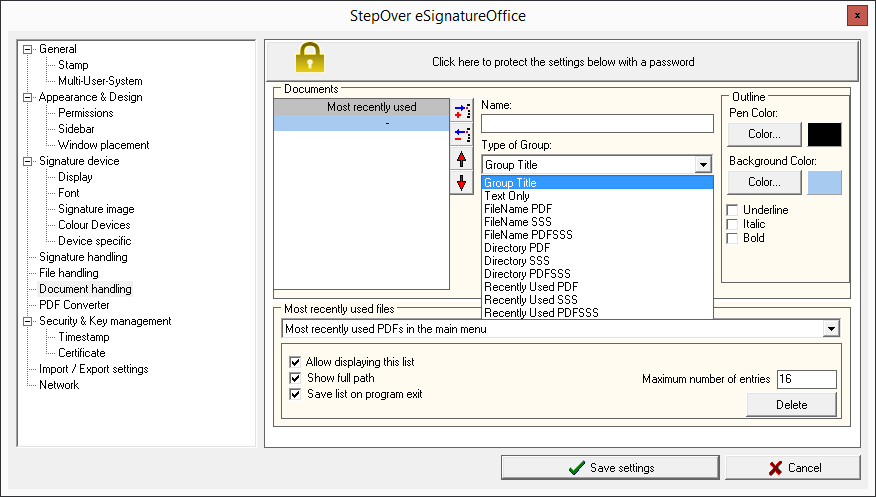 | |||
| Click here to protect the settings below with a password. | This button is available in all cathegories of the administration and allows to set a password to protect your settings from getting changed. You can do this for each menu separately or for all menus at once. | ||
| Documents | This is the list, which previews all your entries, which you can do in this menu with their respective colours, text formats and icons for the different options (PDF only, signature set only, PDF + signature set) to make them easily recognizable. All your entries will later be visible in the sidebar under the first tab named "Documents". This tab will hold all your entries, no matter if they are only single files, whole folders or the list of the most recently used files in each category. By default, there are already two entries:
| ||
Insert  | Clicking this button adds a new entry to your list and then you can change the settings of this new entry by using the other options described here. | ||
Remove  | Select one of your entries from the list and click the Remove button to delete this entry from the list. | ||
Up and down arrows   | With these arrows you can determine the order in which the different entries will be shown in the sidebar. | ||
| Name: | Please enter a name for your new entry here. Please be aware, that this name field will behave different for either single-entries or list-entries, which consist of multiple files (either because you are showing a whole folder or the most recently used files). The different behaviours will be explained with the help of examples after all the options have been described in this table. If you don't add a name, you will be prompted for one when you try to save your settings upon leaving the administration menu. You can also use only a dash as name, which will not show any name plate at all, but only the list, which has been selected for this entry. Please be aware, that due to how the sidebar entries work, nothing will be shown, if you are using the dash as name for a single-entry (e.g. a single file). | ||
| Type of Group: | This is the most influential choice in this menu, because this decides the type of entry, you are adding to your sidebar list. The following options are available:
With the options in the lower part of the menu, you can further customize these entries. (Explained below) | ||
| Start expanded | This option is only available for directory types of groups and when activated, the chosen group is initially always shown expanded and so shows all its content. Clicking on the small arrow icon in the group name allows closing the list again. | ||
| Do not show icons | This option can be used to disable the icons next to each entry in the chosen group. This helps to reduce space usage in the side bar (for example when you want to show longer file names and/or only have a low resolution display) | ||
Bring application to top when files are changed | This option is only available for directories and makes eSignatureOffice to show in the foreground as soon as a new document is detected in the configured folder. With this option, you can keep eSignatureOffice in | the group name allows closing the list again.Do not show iconsthe background or minimized and when a new file is detected, the program is brought to the top, where you can select, open and sign the new document. | |
| Open new documents automatically | This option can be used to | disable the icons next to each entry in the chosen group. This helps to reduce space usage in the side bar (for example when you want to show longer file names and/or only have a low resolution display)Bring application to top when files are changed | This option is only available for directories and makes eSignatureOffice to show in the foreground as soon as a new document is detected in the configured folder. With this option, you can keep eSignatureOffice in the background or minimized and when a new file is detected, the program is brought to the top, where you can select, open and sign the new documentautomatically load and show documents, which are detected in a supervized folder to be new documents. In combination with the previous option, you can run eSignatureOffice minimized or in the background and new files are opened automatically as soon as they are detected. |
| Open new documents in alphabetical order | This option can only be used together with the previous option "Open new documents automatically". If multiple documents are copied in a short time into a monitored folder, these documents are queued and will be opened one after another as soon as the each file is closed. When activating this option here, those new documents will be sorted alphabetical before being opened. | ||
| Start signing after opening the new document | This option can only be used together with the previous option "Open new documents automatically". If you decided to open new documents automatically, you can use this option here to start the signing process automatically just as if you had clicked on the "Sign" button in the user interface or on the signature pad. | ||
| Outline | In this part of the menu, you can customize the appearance of any entry, you have chosen from the list on the left side. Here you can change the typical properties: font colour, background colour, formatting the text in bold, italic or underlining it. | ||
| Most recently used files | In this part of the menu, you can customize the behaviour of the different "Most recently used" file lists by choosing one of the options from the dropdown menu. 3 of the 4 possible entries are the group types previously described. However, the entry "Most recently used items in the main menu" is not seen in the sidebar but as - the name suggests - in the main menu of eSignatureOffice under "File | Open Last Used". Please be aware, that the next few options all apply only to the one list type, which you are selecting here in this dropdown menu. | ||
| Allow displaying this list | Activate this checkbox to make the type of list visible, which you selected from the dropdown list (either one of the 3 sidebar group types or the list in the main menu). Please take note, that this will not automatically show these lists in the sidebar, but only allow showing them. You still need to create an entry with the appropriate group type as described above! | ||
| Show full path | With this option you can decide, if only the file names are supposed to be shown for the selected list (including the file extension) or if the whole file path shall be shown. | ||
| Save list on program exit | Without this option, each file list is only saved temporary for the current eSignatureOffice session. Leave this option activated to permanently save the currently in the dropdown menu selected list. | ||
| Maximum number of entries | In the lower right, you can find a text field named "Maximum number of entries" in which you can write down how many entries shall be saved at max, before the oldest entry is removed. | ||
| Delete | Clicking this button deletes the content of the currently selected list. The list entry itself is untouched and can be filled again with the next opened file. | ||
Here is an example of how it could look like with an explanation of the different settings afterwards:
...