TCP/IP Setup and Usage
Overview
If you are running eSignatureOffice not on the same computer, to which the signature device is connected to, you can bridge large distances with this connection type, either over the internet or your own closed network.
If both software and signature device is used on the same computer, this usage is working without issues, because the connection is provided and managed by the operating system.
However, if the signature device is entirely somewhere else (and so connected to another computer), eSignatureOffice has no idea where to look for a suitable signature device.
Here, the pairing of server and client systems offers new opportunities: the computer, on which eSignatureOffice is installed, is always the server while the computer, to which the signature device is connected to, is always the client.
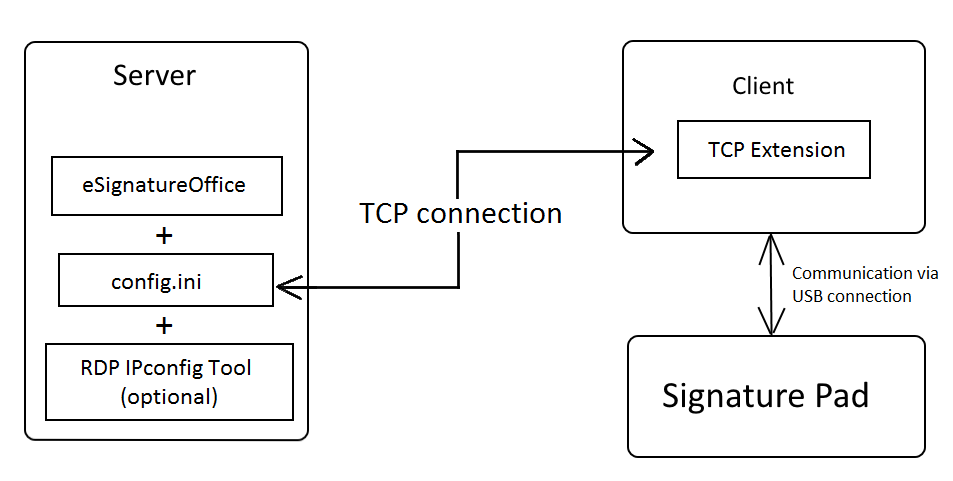
In the following schematic overview, you can see what the general system structure looks like and each part is explained in this manual.
On the server side, the TCP version of eSignatureOffice is installed and the matching config.ini configuration file has to be placed correctly. The server is communicating via TCP connection with the client, on which only the StepOver TCP Extension tool has to be installed. Optionally, you can use the StepOver Remote Desktop IPconfig tool for easier usage. The signature pad is connected to this client.
Setting up the server
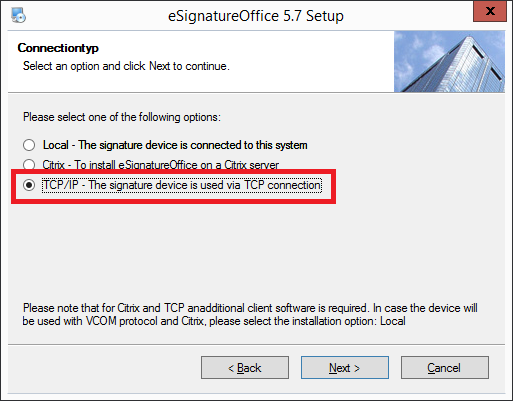
Setting up the server is akin to the default eSignatureOffice installation, except for Step 5, of course, in which you have to select the 3rd option "TCP/IP".
Additionally, the server has to meet the following system requirements:
System requirements | |
|---|---|
| Visual C++ Redistributable for Visual Studio 2015 - 32Bit / x86 | Make sure to install the 32Bit version, even if your Windows is a 64Bit version. https://www.microsoft.com/en-US/download/details.aspx?id=48145 |
| Universal C RunTime | Usually, this is installed by a Windows Update. You only have to install this manually, if you get an error message telling you, that the "api-ms-win-crt-stdio-l1-1-0.dll was not found". https://support.microsoft.com/en-us/help/2999226/update-for-universal-c-runtime-in-windows |
Setting up the client
On the client side, instead of eSignatureOffice, the StepOver TCP client has to be installed, whose most recent version you can always download from: https://www.stepoverinfo.net/download.php?key=tcp-client
As also on the server side, the client side has to meet the following system requirements:
System requirements | |
|---|---|
| Visual C++ Redistributable for Visual Studio 2015 - 32Bit / x86 | Make sure to install the 32Bit version, even if your Windows is a 64Bit version. https://www.microsoft.com/en-US/download/details.aspx?id=48145 |
| Universal C RunTime | Usually, this is installed by a Windows Update. You only have to install this manually, if you get an error message telling you, that the "api-ms-win-crt-stdio-l1-1-0.dll was not found". https://support.microsoft.com/en-us/help/2999226/update-for-universal-c-runtime-in-windows |
Installation of the client software (TCP Extension)
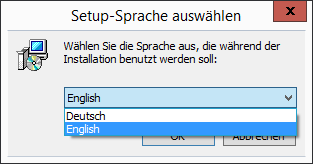
1. After starting the setup file, you have to select your language for the installation process.
|
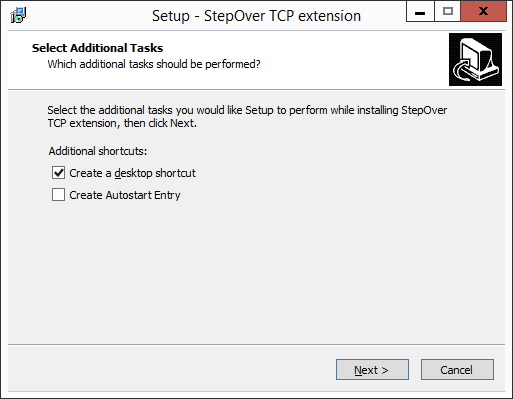
2. The next screen offers 2 additional options to customize your setup. The first option "Create a desktop shortcut" does exactly as it says: it creates a link on your desktop, which you can use later to directly start the TCP Extension Client The second option named "Create Autostart Entry" will make sure, that the TCP Extension will be automatically started together with Windows.
|
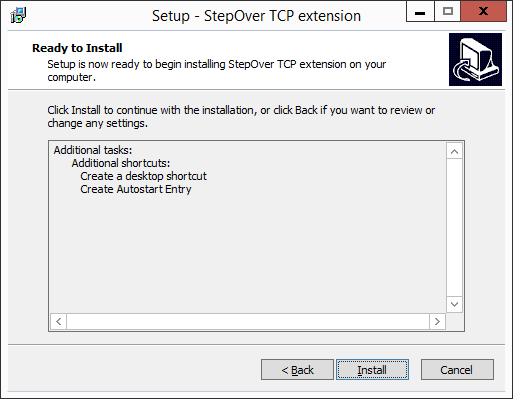
3. Check and confirm the selected settings.
|
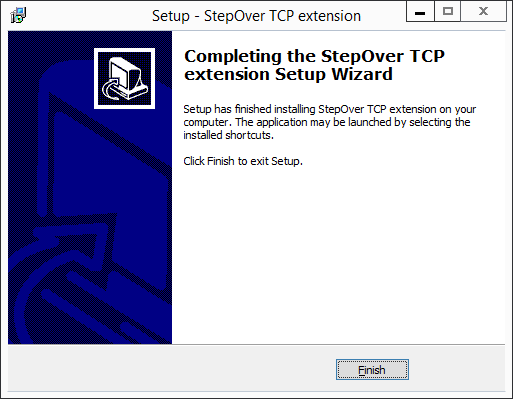
4. Done! Installing the TCP Extension to the client is complete and now you can go to the configuration step.
|
Configuration
Configuring the connection is the more complicated part of setting up your server-client connection.
Important here is creating the config.ini file, in which the address (= IP address) of the computer with the signature device (= the client) has to be written down.
| Eintrag | Erklärung |
|---|---|
[server] | This entry shall show, that this ini-file is supposed to be saved and used on the server side. The client side has his own config.ini, which is configured automatically. |
| ip=0.0.0.0 | This entry is used by the eSignatureOffice device search to look for the computer at the given IP address and then search there for connected devices. Basically, this is the only value, which has to be changed! |
| port=8888 | This is the default port, on which the communication between the parties takes place. If you want to change this port, you have to change it to the same port in both the client and the server config.ini files! Please make sure, that the designated port is not blocked by your firewall. |
| logEnabled=0 | Change this value from 0 to 1 to enable the creation of log files. This option should only be enabled, if you encounter problems or bugs and if you need those logs to solve these problems. |
| logLevel=0 | This value determines the level of detail for the created log files. Allowed values are 0,1 and 2. The higher the value, the more detailed are the log files, but also more system ressources are needed. |
| logLenMax=2048 | This is the maximum size of the log file in kilobyte. |
| logFile=C:\temp\logs\soClient.log | Here, the path and file name of the log file is given. Please make sure, that the designated folder is really already existing, because eSignatureOffice cannot create any folders. |
 | Beware! On the client side, the TCP Extension also creates a config.ini file. This file shows in the first line the entry "[client]" and should generally not be changed (except maybe the port number, if neccessary), because it's managed by the program itself. |
Configuration - step-by-step:
The basic steps to configure your system are shown here:
1. Creating the config.ini for the server with the following templateCreate a new text file and copy the following text into it: [server] ip=0.0.0.0 port=8888 [Common] logEnabled=0 logLevel=1 logLenMax=2048 logFile=C:\temp\logs\soClient.log |
2. Write the client's IP into the config.iniChange the line "ip=0.0.0.0" and replace the four zeros with the IP of the target computer (then this looks something like "ip=192.168.0.1"). If you are not sure, which the correct IP of the target computer ist, please ask your IT department or appropriate colleagues. |
3. Save the config.ini to the correct folder on the serverPlease make sure, that the file will be saved not only with the correct file name, but also with the correct file extension! There are two different possibilities for the correct saving folder: either you have the same settings for all Windows users or separate settings for each user: a) Same settings for all users: Save the finished config.ini in the eSignatureOffice installation folder, which is the same folder, in which you can find the eSignatureOffice executable file SOSigOffice.exe. b) Separate settings for each user: Save the config.ini to the following user specific folder: "C:\Users\<USER>\AppData\Roaming\StepOver\TCPIpExtension" The 2nd option is especially useful, if each user is logging into the server with a Remote Desktop Connection and then uses the signature device, which is connected to their own computer. This way, always the correct IP will be used. |
4. Done!Now you can connect your signature device to the client computer and start eSignatureOffice on the server computer. The device will be found, although it's not connected directly to the server computer. |
Further options, information and troubleshooting
In this part of this manual, you can find additional information, which fits in none of the other chapters.
RDP IPconfig Tool
As the client's IP sometimes could also be dynamical, we developed a small tool to support you by automatically writing the correct IP to the config.ini. This works by consistently checking the network status for open Remote Desktop connections and then writing the found IP to the user specific configuration file.
This means, that...
- this tool helps only, if a TCP session is open.
- multiple different users can connect to the server via remote connection and their respective config.ini is written to their respective user path.
You can start this tool automatically, for example when a user is logging in (instructions here) or you can start it manually. Furthermore, it's completely optional and not neccessary for using this TCP solution.
You can download it here: https://www.stepoverinfo.net/download.php?file=RDP-IPConfig-Set_V3.zip
Optional start parameter for the RDP IPconfig Tool:
Parameter | Auswirkung |
|---|---|
-save2config=<saveToPath> | Enter an alternative saving path for the config.ini here. |
-basicconfig=<path> | Enter the path to an already existing config.ini file, which then will be copied to the appdata folder. |
| -useExternalIP | Tells the program to try to read the external IP instead of the internal IP (=WAN IP instead of LAN IP). |
Configuring IP and port via startparameter
Since eSignatureOffice version 6.2 you can use a startparameter to tell the program which IP and port to use for your tcp connection.
Parameter | Description |
|---|---|
| -tcp=<IP>:<port> | Use this parameter together with the IP of the client-pc in your network, followed by a colon, followed by the port over which the communication should be done. By default, this is port 8888. Please take care to always write this port in the parameter call, even if you want to use the default port. example: "-tcp=192.168.0.1:8888" |
With this method you don't have to configure the config.ini manually, because eSignatureOffice will check on startup if the file exists and can also create it for you, if it does not exist. But please be aware that depending on the installation path, admin rights might be needed because the config.ini has to be copied to the eSignatureOffice path.
The correct licence key
In case you are trying to register your product, but you get the notification to check your licence key, it's possible that you tried to use the licence key for a standard version of eSignatureOffice instead of a licence key for a TCP-specific version.
So, please check the last string of numbers of your licence key and make sure, that it contains "017". If it does not contain this sequence of numbers, but you actually ordered a TCP licence from us, please send an email to info@stepover.de and if possible, please tell us the document number of your invoice or your order confirmation.
Problems / Troubleshooting
| Problem description | Possible reasons and/or solutions |
|---|---|
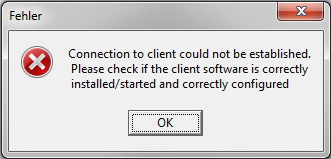
If the server cannot finde the configuration file (config.ini) or it cannot connect to the client, the following error message will be shown. | a) Missing config.ini file. Please make sure, that the file is really existing and that it contains the correct client data. b) A firewall is blocking the connection, the wrong IP is written in the config.ini or there are any other problems with your network connection. To find out, where the problem could origin, you can use the Telnet service on the server side to test, if you can connect to the TCP client. |
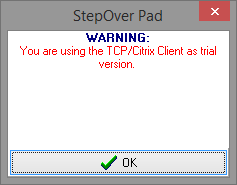
If the licence of the client has not been activated yet, the following message will be shown at the beginning of each signing process.
| As soon as the TCP Extension is started on the client, the request to activate the product licence is shown. Please enter your licence key, which you were sent, either by us directly or by your service provider. StepOver licence keys for TCP compatible programs always contain the combination "017" in the last string of numbers. So, please make sure, that you are also using a key, which matches your software version. |
| A buffer overflow exception (appreviated BEX) access violation occurs or the program is terminated while using Windows Server 2008 R2 with Terminal Service. |
|
| Error message, that the file "api-ms-win-crt-stdio-l1-1-0.dll" could not be found. | This file is part of the universal C RunTime, which is normally installed by Windows Update. If your system has not installed the needed updates until now, you have to install the C RunTime library yourself: https://support.microsoft.com/en-us/help/2999226/update-for-universal-c-runtime-in-windows |