5. Working with eSignatureOffice
- Andy Erd
- Michael Spreen
Working with eSignatureOffice
Guide through the user interface
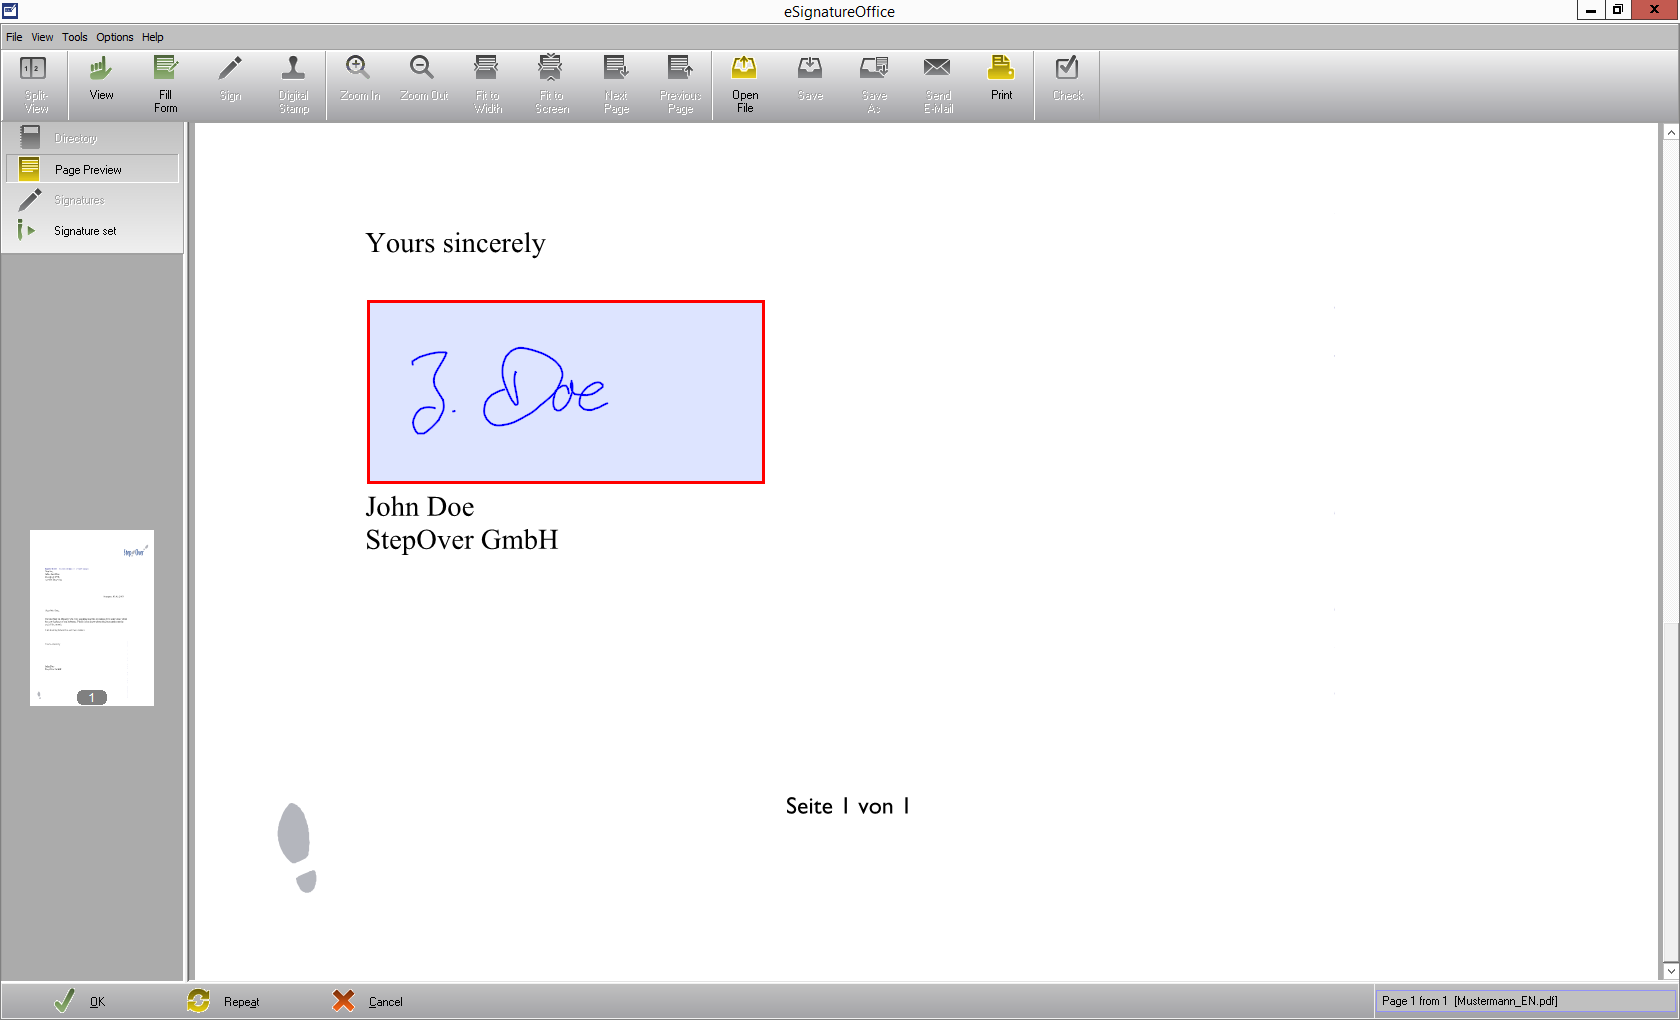
The following picture shows an overview of the user interface of eSignatureOffice in the design of the current version 5.x. You can adjust the design of the upper toolbar or generally the whole colour design in the administration menu under "Appearance & Design". Here, you will get a short overview over the different parts of the user interface, its buttons and then extended descriptions of the respective functions.
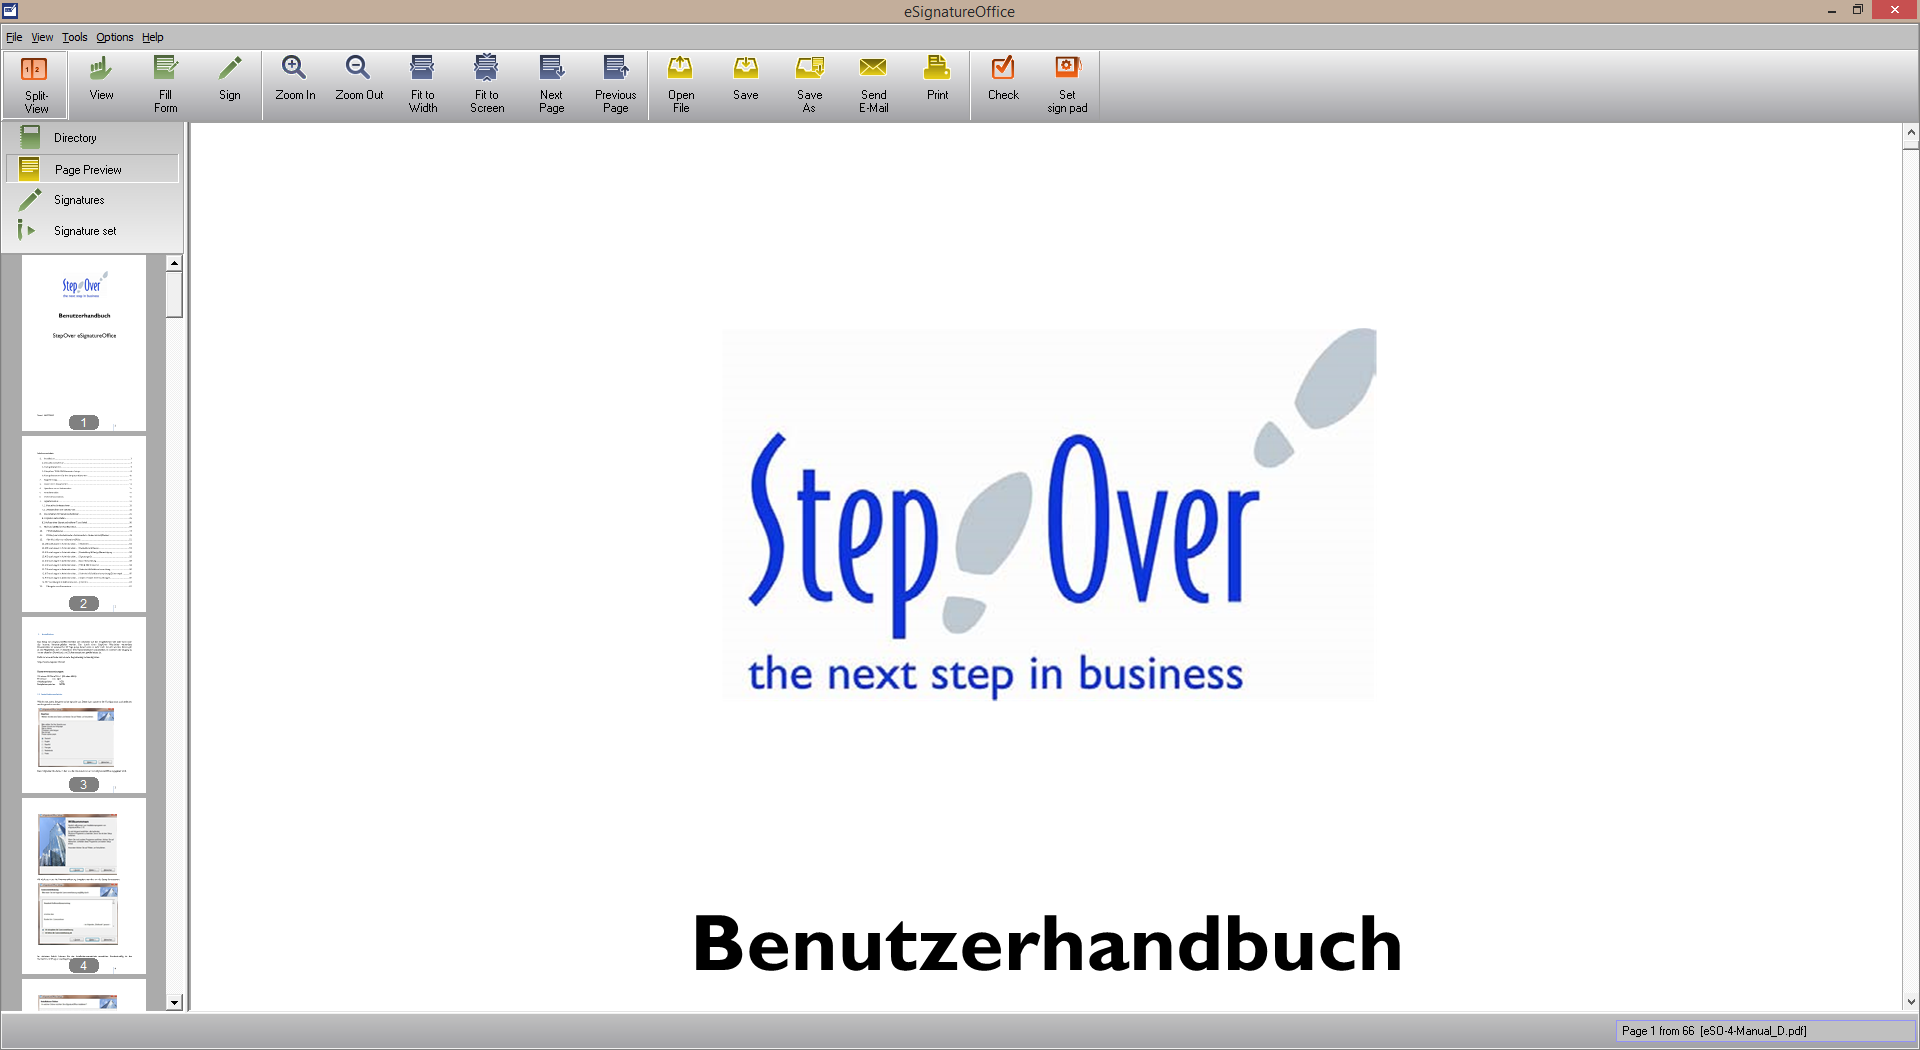
With the help of the toolbar, you can directly access different functions, which either offer different ways to sign (coloured green here) or make reading more comfortable (blue) or allow working with your files (yellow).
The toolbar
If all available buttons are activated, the following options are available (from left to right). You can also configure this toolbar in the administration tab Appearance & Design.
| Option | Explanation |
|---|---|
| View | The view mode, which offers varying options to read or just look at the document, for example zooming or changing shown pages |
Fill Form | Here you can fill formular fields, which are included in your document (check boxes, text fields etc.), which you added in other applications to the document. |
Sign | The signature mode or simpy sign mode, in which you can manually draw a signature rectangle at any position in the document in order to sign it. |
Digital Stamp | With this option, you'll open a dialog to select a picture file, which you can use as your signature and add it to the document. |
| Zoom In | Enlargen the view of your document by zooming closer in. |
| Zoom Out | Reduce the size of your document by zooming out. |
| Fit to Width | Use the available window width to show the document as large as possible. |
| Fit to Screen | Resize the picture until the whole, currently shown page is visible on the computer screen. |
| Next Page | Page forward; eSignatureOffice will jump to the top of the next document page |
| Previous Page | Page backward; eSignatureOffice will jump to the most recent top of a page in your document. This also means, that if you are far down on a page, this button will jump to the top of the same page. |
| Open File | Open a file selection dialog to load a document. By default, only PDF files are shown here. |
| Save | Save the current document. |
| Save As | Save the current document with a new name or at another path. |
| Send E-Mail | Open a new window of the default email program, to which the currently loaded document is already added as file attachement. |
Open the print menu to print the currently loaded document. | |
| Check | Open the document information window, in which you can get a lot of information, like if the document has been manipulated, how many signatures are included, when and with which signature pads they have been added. |
| Set sign pad | This is a shortcut for your toolbar, which allows to directly change your signature device without having to go the longer routes over either the main menu oder the administration menu. |
The sidebar
If the respective preconditions are met, the sidebar offers the following (support) options. You can configure this sidebar in the administration tab Sidebar.
| Option | Explanation |
|---|---|
| Documents | By default, you can see a list of the most recently used documents here. However, you can also edit this to show your own choice of document and/or signature-sets. You can find an explanation on how to do this here. |
| Directory | Show the document's directory, if there is one included. Otherwise, this item is grayed out. You can use this directy to easily navigate the document by clicking the paragraphs and chapters. Please be aware, that a simple directory in text form within the document is not enough to be used as digitally usable directory! |
| Page Preview | Show a small preview of each of the document's pages. |
| Signatures | Show a list of all signatures, which have already been added to the loaded document. The list includes further details like the contact information of the signer, the time of signing (locally and the time server), different certificates proving the signature to be real etc. |
| Signature set | Show all signature-set files in the current signature-set folder, if there is at least one available. You can also use this list to double-click any set to start it directly. |
Loading a document
There are different ways to load a document in eSignatureOffice:
- from the file system of the used computer or its local network (Open File)
- from another program
- from a FTP server
- as start parameter
1. From the file system or a local networkIf you have an already prepared PDF file, you can load it in eSignatureOffice by clicking on the "Open File" |
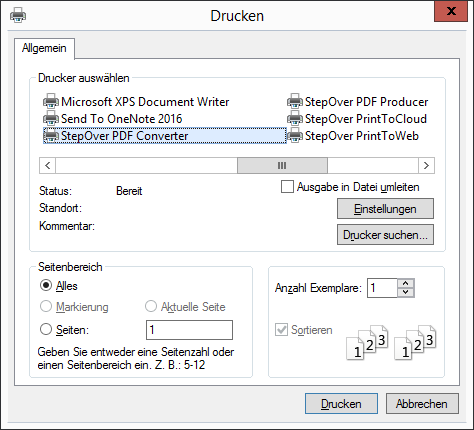
2. File transfered from another programIf you file is not readily available as PDF, we're recommending to use the StepOver PDF Converter. If you have it already installed after the eSignatureOffice setup, you can skip to the next step. Otherwise, you'll find instructions in the chapter The StepOver PDF Converter. How to use the PDF Converter: In case it's already started, please close eSignatureOffice: it will be started in one of the following steps automatically together with your new document. Open your document in your application (i.e. your text formatting program) and choose "Print". In the following printer selection dialog, choose the StepOver PDF Converter and start the printing process, which will not really print the document but convert it into a PDF file and transfer it directly to eSignatureOffice, which will then start automatically together with your newly created PDF file. You can change this behaviour in the PDF Converter section of the administration menu.
|
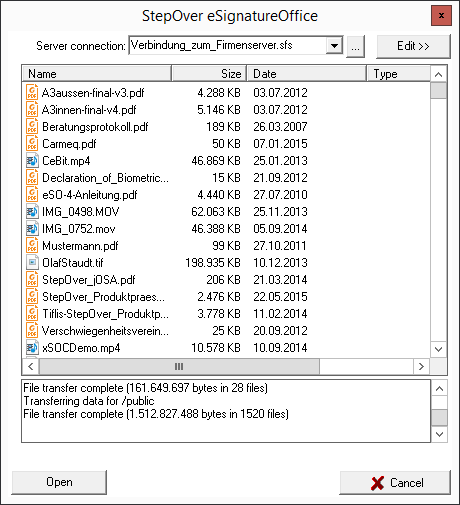
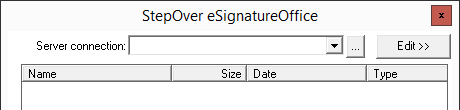
3. Loading a file from a FTP serverIf your PDF file is located on a FTP server, you can load it to eSignatureOffice by using the option "Open from FTP" in the "File" menu. In the following FTP dialog, you're having the option to connect to a FTP server and directly download and open files from there. Choose your FTP server connection from the drop down list "Server connection".
After succesfully connecting to the server, you can view its content and and open PDF files by left-clicking on them and choosing "Get".
How to configure a FTP connection will be described at the very end of this chapter in the section FTP settings. |
4. Transfer via start parameterIf you're calling eSignatureOffice from another program (for example from a self-created application or batch file), you can pass the path and name of the desired PDF file as combined start parameter. You can find more information about this topic here: Startparameter |


Saving a document
In order to save a document at its original location, please use the "Save" icon  or the matching menu item in the "File" menu.
In order to save the document to another location, use the "Save As" ![]() icon or the matching menu item, also found in the "File" menu.
icon or the matching menu item, also found in the "File" menu.
You can also save files with the help of macro actions, which you can define in the "Configure macro buttons" - dialog. Learn more about this topic in the chapter Working with macros.
Viewing Mode
This is the default mode in which eSignatureOffice will be after loading a document and it allows the user to closely inspect and read the document before signing it. This can be very important because in most cases, the creator of a document is not the same person, who will sign it in the end.
If you want to switch from another mode back to the viewing mode, simply use the "View"  button in the tool bar.
PDF Form Fill Mode
You can start the PDF Form Fill Mode by clicking the "Form Fill"  button in the tool bar. This button can only be activated, if there is already a PDF document loaded in eSignatureOffice. This mode allows to fill information into form fields, which you added for example with Adobe products (they can't be added in eSignatureOffice). You should do this before signing the document and afterwards you can save this additional data into the document.
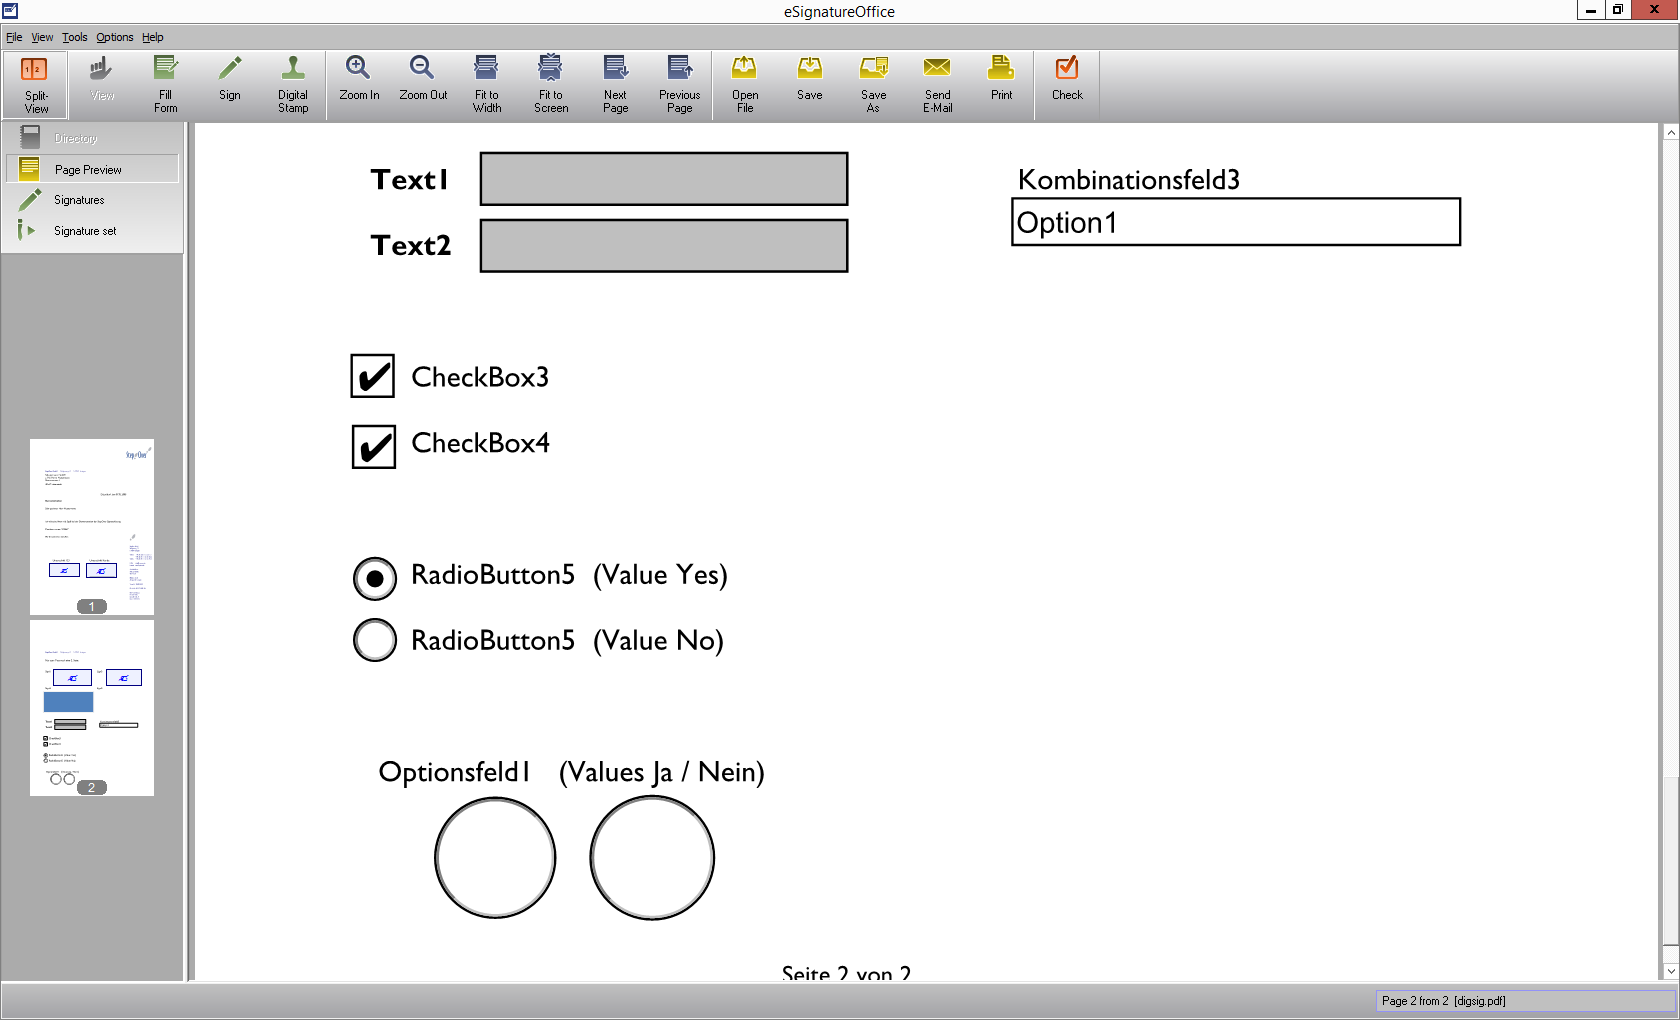
- As you can see in the image, you can fill these PDF form fields in eSignatureOffice. This is true for radio buttons, check boxes, text fields and further possible fill-out support options, you might know from Adobe (and other) products
- With the tab key on your keyboard, you can automatically jump to each available form field within your document and so can complete them one by one.
- After saving the file, you can read the content of these form fields in other applications with a normal full-text search.
- With the help of command parameters (via *.fff file) it's possible to have a pre-filled form fields upon loading the PDF document. However, these fields are still editable in eSignatureOffice. You can find further information about start parameters in the chapter Startparameter.
Sign Mode
You can enter the sign mode via the "Sign"  button in the tool bar. This sign mode is the inner core of eSignatureOffice's functionality, in which you can digitally and safely sign your documents.
The number of signatures per page and document is not limited and you can add the name, the location and the reason for the signature to each of these signatures. Additional data like time and date are captured and saved to the document as well. All this data can later be retrieved from the document.
Manual signing
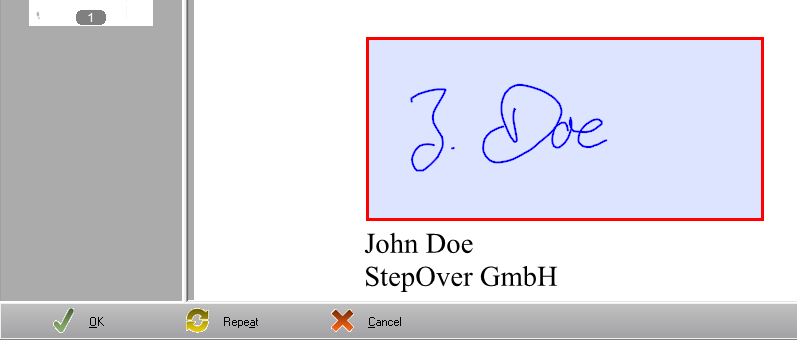
Switch to signing mode as described above by clicking the "Sign" button. Now, click and hold your left mouse button in the document near the place where you want to add the signature and draw the so-called signature rectangle. By default this rectangle is framed red and filled blue. However, you can change this design in the administration menu in the "Appearance & Design" tab. You can sign in this drawn signature rectangle now.
In the footer of eSignatureOffice, you can find the "Ok", "Repeat" and "Cancel" buttons now.
- With "OK", you're attesting, that you are content with your signature and that you want to add it to the signature now. Depending on your settings, you might still have to confirm one or two additional dialogs.
- With "Repeat", everything in the current signing rectangle will be deleted, but not the rectangle itself. You can immediately sign at this position again.
- "Cancel" stops the whole signing procedure and deletes the signing rectangle, including the signature, and sends you back to the manual signing mode, where you can draw a new rectangle, if you wish.
- You can find a detailed step-by-step guide on how a complete manual signature procedure looks like here.
Digital Stamp
By clicking the "Digital Stamp"  button, you have to possibility to add a picture to your document instead of a written signature. So, when the file selection window opens, choose your picture and by pressing "Open", it will be copied to the document. Afterwards, you still can adjust the picture's size and the exact position before you can finally add it to the document with the help of the previously explained "OK" button in the footer of eSignatureOffice.
- Please take note, that the preview of the picture is not in the final quality, which will be shown in the document, because the picture quality is reduced drastically in order to minimize graphic errors when resizing or repositioning.
- Please also take note, that the process to add the picture can take a while, depending on the size of your picture.
You can use this digital stamp feature, for example, to add premade signatures, company logos etc.
As an example, here a StepOver company stamp for signatures:

Saving the signature
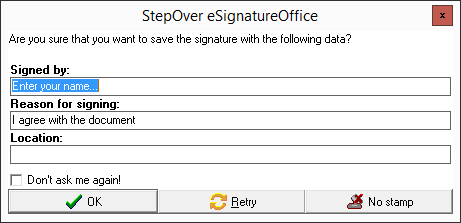
After performing your signature and clicking the "OK" button (or after the automatic timeout), this dialog is shown. Here, you will be asked for the signer's name, the reason for the signature and the location; respectively, you will be asked to confirm previously stated information. After succesful confirmation, the signature will be added permanently to the document.
This cannot be reversed in any way without reloading the document (After saving the document, even reloading won't help). Providing this information is mandatory - except if this dialog has been deactivated in the administration menu. This means, you cannot skip this step in the signing procedure. If you opt to cancel this dialog with the little red X in the upper right corner, you can keep on signing, but after each signature, you will be asked again to confirm the given information. If the dialog is completely deactivated, the signature will be added immediately after pressing the "OK" button in the footer.
To deactivate this query, for example because this information is provided by the document itself or because you don't want a stamp to be shown,check the "Don't ask me again!" option before proceeding. If you do this, the button, which you click to leave this dialog will be saved for future signatures. This means, if "Don't ask me again!" is checked and you click "No stamp", then the dialog will not be shown for future signatures and no visible stamp will be added to your documents.
In case you want to reactivate this query, you can do this without any problems in the administration menu in the "General" tab by checking "After signing - ask for name and reason for signing".
All provided data will be encrypted and saved together with the signature and so can later be read from the document.

After you have entered all information and confirmed with the "OK" button, the signature will be extended by the sign stamp below the signature image, just as shown in the upper picture. This stamp contains all provided information (Name, Reason...) as well as the signature's date and time. Of course, you can also deactivate this stamp in the administration menu in the "General | Stamp" tab, which will lead to the stamp not being shown, but the data will still be saved together with the signature.
After all necessary signatures have been added, you can save the document.
Signing with mobile devices
Since version 6.2 eSignatureOffice also offers the option to use your smartphone or tablet to sign your document instead of signing with a sign pad or a tablet PC.
You can find a detailed description and explanation of this topic in the chapter Signing with mobile devices.
Automatic creation of signing fields: Working with signature-sets
The effective use of signature-sets can make your work with eSignatureOffice much faster and easier by using automation features, e.g. by finding a certain string of characters in a document (for example "Signature customer") and then creating a predefined signing field in a predefined position relative to the found searchstring. So, you could create a signature-set, which would be able to search in any PDF document for the word combination "Signature customer", then it could create signing fields of let's say 30x60mm size to the upper left of all found spots. Afterwards the signature-set shows all these signing fields one after another to sign them.
This method is best used when working with large numbers of documents or different users/customers.
You can find a detailed description and explanation of this topic in the chapter Automatic creation of signing fields: Working with signature-sets.
Automating complex processes: Working with macros
Macros can make your work with eSignatureOffice even easier, either by completely automating frequently used actions and complex processes or by allowing to use them with a simple click.
Especially in combination with signature-sets, this can lead to much faster and more effective working processes.
You can find a detailed description and explanation of this topic in the chapter Automating complex processes: Working with macros .
Dynamic processing of document content
eSignatureOffice offers multiple possibilities to read the content of the loaded document and then use the found data to dynamically show custom dialogs, save with custom file names etc. without having to statically predefine this data for each user or each document. Each and every button with the magnifying glass icon  leads to Dynamic processing of document content.
FTP settings
Open the FTP dialog by using the "Open from FTP" item in the "File" menu.
To create a new server connection, please use the "Edit" button in the FTP window and you'll see this:

If this section has not been password protected by your IT/administrator, you'll have the possibility to edit files, create new connections and also define a default connection here. If a default connection has already been set up, eSignatureOffice will always try to connect to the given server when you're using "Open from FTP". If you don't know the needed FTP connection information, please contact your IT-department.
The button "Sace this connection" allows to save your currently entered data in a SFS file (StepOver FTP-Set) to any folder you want, for example to make is usable by colleagues, to use it in a macro or if you often have to switch between multiple FTP servers and don't want to enter the connection data again and again.
By the default, the saving path for these FTP-sets is "C:\Users\[Username]\Documents\StepOver\FTPSets\", whereas [Username] is the name of the currently logged in Windows user and so this saving path is always individual for all users. However, you can change this default path in the administration menu in the Network tab.